- Go to www.bingplaces.com.
- Click “New User” button.

- Click “Claim or add your business manually” button.

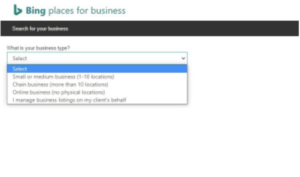
- Select the type of business from the dropdown.

- Add your business information – Contact Number or Business Name, and Business Registered Address

- Continue creating your business profile by clicking on the Create New Business Button.

- Sign-using your prefered account. (Google, Facebook, Microsoft or Work Account. Create one if you do not have the following.

- Input additional information about your business. Then click “Next” button.

- Provide the most relevant category information about your business. Then click “Next” button.

- Enter your business contact details, then click “Next” button.

- Review image guidelines before adding high-quality photos of your business. Click the “Next” button when done.

- Add the accurate business working hours for your organization, then click “Submit” button.

13. You will receive an auto-call from Bing Places to receive your Bing verification code. Enter the code on the space provided, then click on the Verify Now button.


